How to Use Project Wizard
FantaMorph offers a Project Wizard that is a great start point for beginners. You can easily create your first morph by this step 1-2-3 wizard. If you are familiar with the program, you can freely create your morphs by following the process described in the Quick Tutorial.
1. On the welcome window, you can choose one task from "Open an existing project" or "Create a new project". You can quickly load one of the three recent projects by clicking a hotlink under "Open an existing project". If you don't want to use the wizard at startup of the program, just check the "Don't show this wizard again". You can still launch the wizard by choosing the File/New Project Wizard menu at any time.

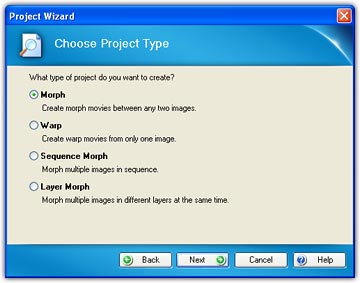
2. Choose project type you want to create. If you choose "Warp" or "Multiple Morph", the subsequent dialog boxes will be a little different from those ones in step 3 & 4 for "Morph".
3. Now you should import two source images for "Morph", or only one image for "Warp", or a series of images for "Multiple Morph". Learn more about "How to Import Source Image"...

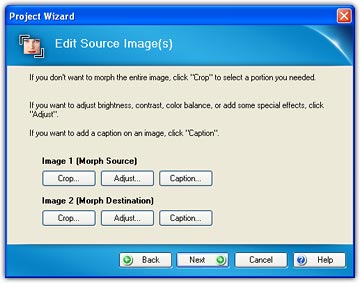
4. Now you can crop, adjust source images or add caption if needed, or else just press "Next" button to bypass this step. Learn more about "How to Crop Source Image", "How to Add Filters" and "How to Add Caption"...
5. Now you need to set the movie size and length. You can choose any fixed value offered in the Movie Size list, or you may set it to any desired value by choosing the button "Set Custom Size". The default frame count value is 15, if you want a smoother, more detailed morph result, simply add more frames. If you want to set the movie length by duration, just click the "Set Duration" button. See more about "How to Set Movie Length"...

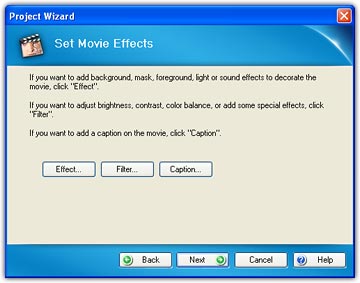
6. At this point, you have some choices to decorate the final movie. If you want to do this at any time later, just press the "Next" button. Learn more about "How to Use Add-on Effects", "How to Add Filters" and "How to Add Caption"...
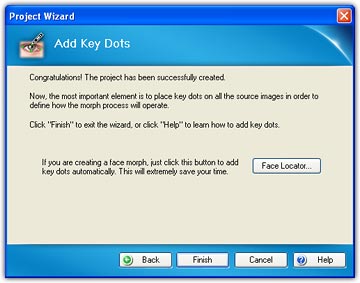
7. The morph movie has been now created. Because you have
not added any key dots, the morph is simply a cross-dissolve between the two
source images. Now, click the "Finish" button to exit the wizard, and start the
most important work that is to place key dots on both source images in order to
define how the morph process will operate. Learn more about "Edit
Key Dots"...
In FantaMorph Deluxe, a "Face Locator" button will appear on this page. Click it
to automatically place key dots on images of human face. Learn more about "How
to Use Face Locator"...