Lesson 9 - Create Sequence Morph
In most cases, we create a morph between two images, but you can
also morph more than two images in a single
project easily.
A morph between two images is called a Sequence,
a movie consists at least one sequence, and you may create as many sequences as
you want (for Pro, limited by your system resource; for Deluxe, this will be
unlimited).

Assume we have a series of source images, called A, B, C, D, E, F, etc. As shown in above figure, you can create a long movie as below consisting of the morph A to B, then B to C, then C to D, and so on.
 |
|
In most cases, the beginning image of the next sequence is the same as the ending image of the previous sequence, so the final movie looks smooth. However, you can place any image in any sequence, so the final movie can be consisting of the morph A to B, then C to D, then E to F, and so on, it looks a little jumpy though.
There are 4 ways to create a multiple morph, see "How to Morph More than Two Images". In this lesson we introduce how to create a multiple morph step by step manually.
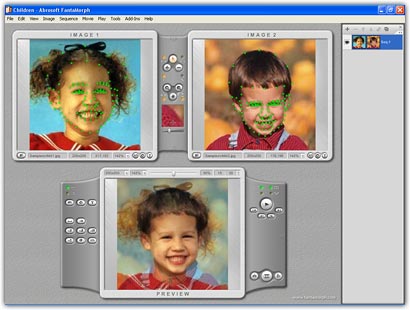
1. Create the first sequence that morphs A to B as introduced in previous lessons. Press F2 key or choose the View/Sequence List menu to display the sequence list.
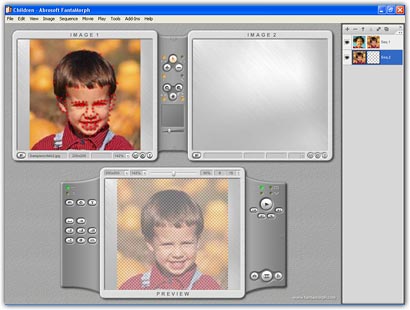
2. Choose the Sequence/Add Sequence menu, the second sequence will be automatically created where the Image 1 is a duplicate of Image 2 of the first sequence. Note, if you choose the Sequence/Add Blank Sequence menu, the second sequence will be automatically created where both the Image 1 and Image 2 are blank, then you can import any new image for them.
3. Now import C as Image 2, then add/delete/move key dots to finish the second sequence.
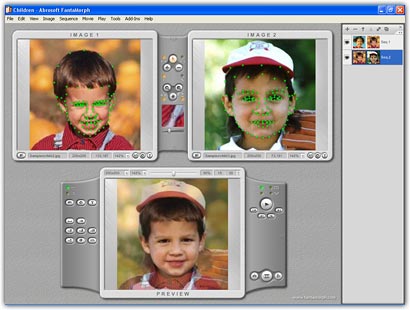
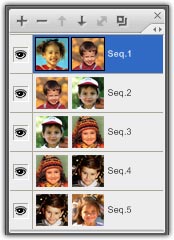
4. Repeat Step 2, 3, load all the source images to this project and set them for corresponding sequence. In this example, we use 6 source images and finally got 5 sequences as shown below.
5. Please note that there are two additional options on
the preview panel, the Auto Play
All (![]() )
and the Auto Switch (
)
and the Auto Switch (![]() ). By default, the program only plays the
current sequence, also, dragging the
Preview Slider (
). By default, the program only plays the
current sequence, also, dragging the
Preview Slider (![]() )
can only present each frame of the sequence. But if you turn on the Auto Play All, you can preview
all the sequences one by one smoothly. Turn on the Auto Switch, the program will
automatically switch to the corresponding sequence during playback or dragging the
Preview Slider.
)
can only present each frame of the sequence. But if you turn on the Auto Play All, you can preview
all the sequences one by one smoothly. Turn on the Auto Switch, the program will
automatically switch to the corresponding sequence during playback or dragging the
Preview Slider.

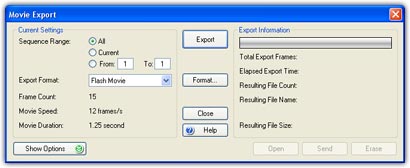
6. When you export a sequence morph, there is an option Sequence Range on the Export window as shown below. Choose All (default) to export the whole movie, choose Current to export only the current sequence or you can set a From ... To sequence range to export.